こんにちは。
前回のfaster-whisperとpyannoteによる文字起こし+話者識別機能を、ネットからモデルをダウンロードするタイプではなく、あらかじめモデルをダウンロードしておくオフライン化を実装してみました。
前回の記事はこちら。

これにより、ネットがつながらない環境でも実行できたり、毎回ネットからモデルをダウンロードする手間が削減できます。
文字起こし実装したいけど、そのような課題を抱えている方の参考になれば幸いです。
それではよろしくお願いします。
モデルのダウンロード
faster-whisperとpyannoteのモデルのダウンロード方法について解説します。
faster-whisper
以下のHuggingFaceからモデル一式をダウンロードします。

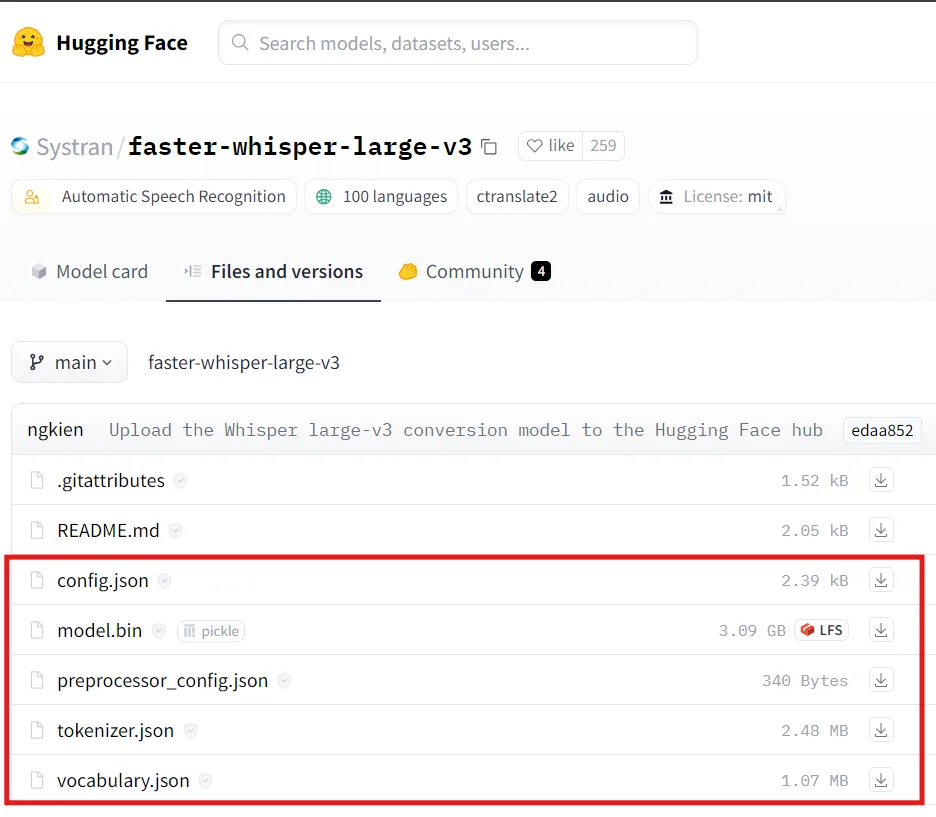
赤枠部分を全てダウンロードし、「large-v3」フォルダを作成してまとめて保存しておきます。
faster-whisperについては以上です。
pyannote
pyannoteもHuggingFaceでしょ?と思うでしょうが、HuggingFaceのモデルをダウンロードしてもうまく動きませんでした・・。
そこで次の記事を参考にしました。

ただこの方法でもうまくいかず、途中まで参照したいと思います。
Google Colabで必要なファイルをzipにまとめている、以下のコードのところまで一緒です。
!zip -r assets.zip ./assetsassets.zipをダウンロードして解凍すると、以下のような中身になっているかと思います。

今から2つのファイルを取り出します。
「models–pyannote–segmentation」→「snapshots」→「660b9…(ハッシュ値みたいなフォルダ名)」→「pytorch_model.bin」
「models–pyannote–speaker-diarization-3.1」→「snapshots」→「84fd2…(ハッシュ値みたいなフォルダ名)」→「config.yaml」
これでpyannoteもOKです。
実装
それでは実際にコードを書いていきます。
Githubで作成したコードは以下です。
では先ほどダウンロードした、
- large-v3フォルダ(faster-whisper)
- pytorch-model.bin(pyannote)
- config,yaml(pyannote)
を以下の図のように、前回作成したGithubコードに保存します。
(※pytorch-model.binをpyannote_model.bin、config.yamlをpyannote_config.yamlとリネームしております)
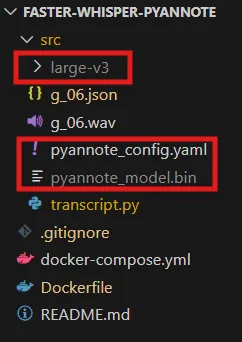
「transcript.py」が実行コードになりますので、今回は実行コードと同じ階層に置きます。
まずは「pyannote_config.yaml」を編集します。
「segmentation: pyannote/segmentation-3.0」を「segmentation: ./pyannote_model.bin」とします。
version: 3.1.0

pipeline:
  name: pyannote.audio.pipelines.SpeakerDiarization
  params:
    clustering: AgglomerativeClustering
    embedding: pyannote/wespeaker-voxceleb-resnet34-LM
    embedding_batch_size: 32
    embedding_exclude_overlap: true
    # segmentation: pyannote/segmentation-3.0
    segmentation: ./pyannote_model.bin
    segmentation_batch_size: 32

params:
  clustering:
    method: centroid
    min_cluster_size: 12
    threshold: 0.7045654963945799
  segmentation:
    min_duration_off: 0.0
編集したら保存します。
transcript.pyの中身は以下のようにします。
(※main関数だけの紹介にとどまり、その他の詳細はGithubをご覧ください)
def main(audio_file):

    # ============= faster_whisper s ================
    # offline(ダウンロード済モデルを使用)
    model = WhisperModel("./large-v3", device="cpu", compute_type="int8")
    segments, _ = model.transcribe(audio_file, vad_filter=True)
    # ============= faster_whisper e ================

    # ============= pyannotte s ================
    # offline(ダウンロード済モデルを使用)
    pipeline = Pipeline.from_pretrained(
        "pyannote_config.yaml",
    )
    waveform, sample_rate = torchaudio.load(audio_file)
    duration = waveform.shape[1] / sample_rate
    diarization = pipeline({"waveform": waveform, "sample_rate": sample_rate})
    # ============= pyannotte e ================

    results = concat_whisper_pyannote(segments, diarization, duration)

    return results
とてもシンプルで、それぞれ保存したモデルのパスを渡してあげるだけでオフライン化は完了です。
あとは前回と同じように実行すれば動きます。
モデルのロード時間が短縮されていることが確認できるかと思います。
まとめ
今回はfaster-whisperとpyannoteのオフライン化対応方法について紹介しました。
意外とネットの情報が少なく、またネットの情報通りではなぜかうまく動かないことがあり、苦戦しました。
もし同様に苦戦している方がいた際のお役に立てれば幸いです。
ここまでご覧いただきありがとうございました。